Bulk Import/Export CRM Recommendations Rules

Content recommendations enable admins to create policies (rules) that suggest the most relevant materials for each sales conversation in Salesforce. These recommendations, which include resources such as videos, ebooks, white papers, and infographics, are tailored based on deal data in Salesforce.
Ensuring your sellers always have access to the most relevant, data-driven recommendations is key to driving personalized and impactful customer engagements. Managing your CRM recommendation rules at scale—through bulk import and export—makes this possible in an ever-evolving product landscape, enabling consistent, high-quality guidance across your sales organization.
Whether you’re looking to streamline your processes or enhance the effectiveness of your sales efforts, understanding the power of bulk importing and exporting will help you unlock new levels of productivity and success.
Classic Situation
A company has updated the URL of their CRM and wants to set up a new connection with Showpad without losing their existing recommendation rules. In order to do so, they would need to:
- Back Up both their CRM and Showpad Data
- Create and authorize a new CRM connection
- Manually recreate each recommendation rule.
- Verify the consistency of the data mapping
- Test the new connection in a staging environment
- Review and validate their recommendation rules
- Monitor both the data synchronization and recommendations
- Fine-tune and troubleshoot any issues
Given the numerous manual steps involved, the process is highly susceptible to errors and data contamination. As a result, the company aims to minimize manual interactions to reduce the risk of such issues.
Bulk importing/exporting their recommendation rules would provide flexibility, security, and efficiency, especially during major system changes like a URL update. It would ensure they can manage, migrate, and restore rules quickly while reducing risks and save time.
Keep reading to see how Showpad simplifies this process.
Postman & Salesforce Example
- Plan: Ultimate | Advanced or Expert
- Permissions: Administrator access to Showpad's Admin App
- Config:
- Salesforce integrated with Showpad
- Familiarity using Postman and API requests
The example outlined in this article takes place in three locations:
| Location | Description |
|---|---|
| Showpad | This is where you'll define and manage your CRM Recommendation Rules, as well as obtain Showpad credentials to use with Postman. |
| Postman | This is a free tool to test and execute API requests. You can use it both as a desktop client and in a web browser. You can sign up for a free account here. |
| Salesforce | Showpad recommendation rules use the API names of Salesforce objects and fields. There are two ways to obtain these:
|
Showpad
Your CRM Recommendation rules govern what is shown in which CRM context. You can manage your recommendation rules via the Admin App or Showpad API
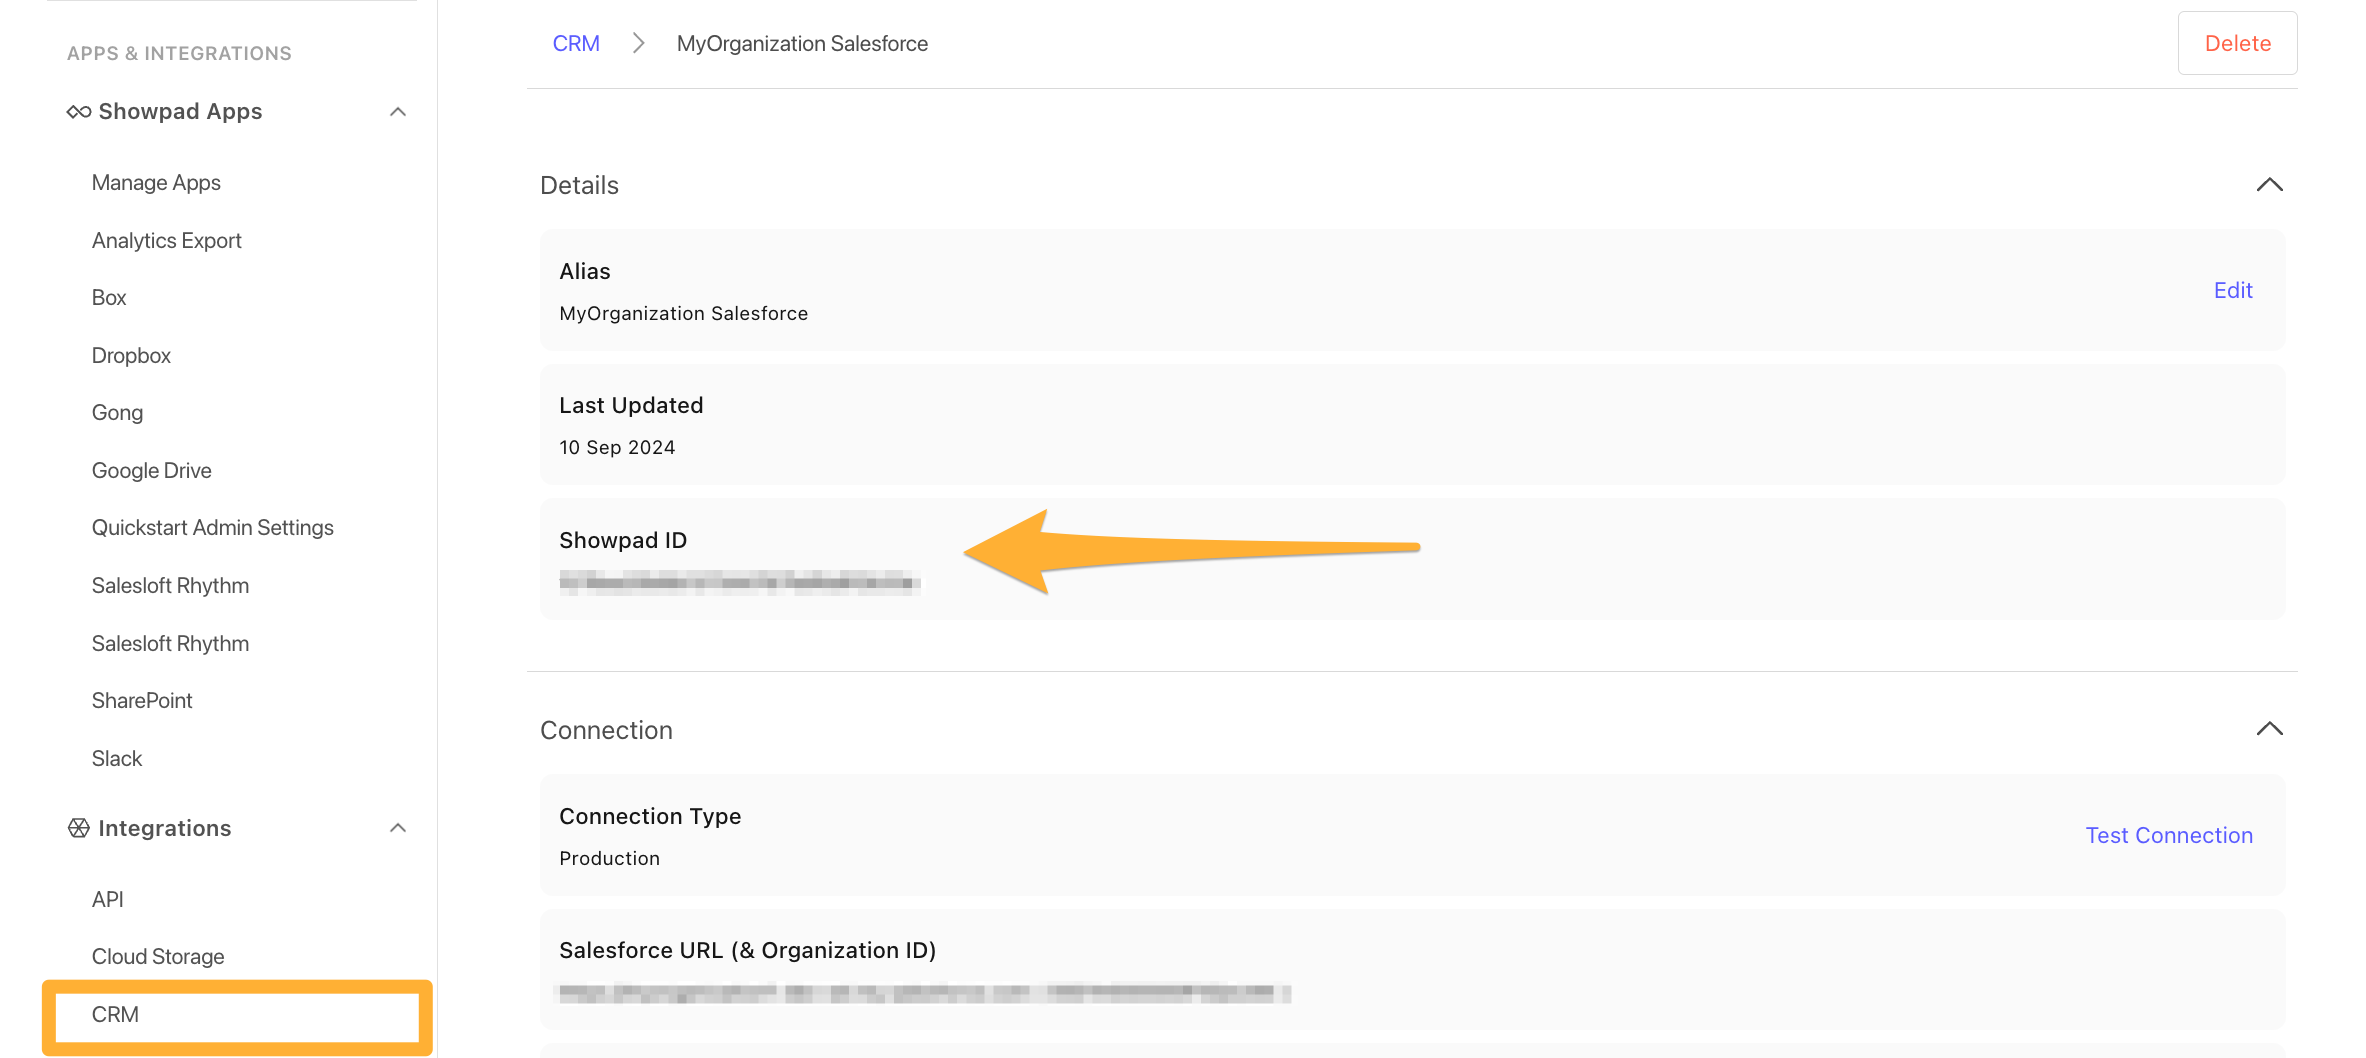
In order to connect to Showpad with Postman, you'll need your Showpad ID:
-
As an admin, navigate to Settings and select CRM from the Integrations section.
-
Click on your CRM connection to view its details.
-
Copy your Showpad ID from the Details section. You'll use this ID in Postman to identify your CRM environment.
You'll also need a Showpad API token in order to export or import your recommendation rules. See the Authentication page in the Showpad API section for detailed information.
Postman
This example demonstrates using Postman to create and run API calls to and from Showpad.
Overview
The following sections describe the key items you'll need.
Workspace
To get started with Postman, you'll need to establish and configure a workspace. You'll find all the details about workspaces here.
For this example, we're using a blank workspace.
Collections
It's a good idea to create collections to save and organize your API requests. You can learn more about collections here.
We recommend that you create a collection that contains separate requests for each individual recommendation rule.
Environment
You'll also want to create an environment. This is where you can create variables to store and reuse data like user IDs, authentication tokens, and other key values across multiple API requests, reducing the risk of error and saving time.
A common use case is environment-based variables, such as the {{env_subdomain}} variable. This variable can be used to
represent a unique subdomain that changes depending on whether you’re working in a development, staging, or production
environment, as seen here:
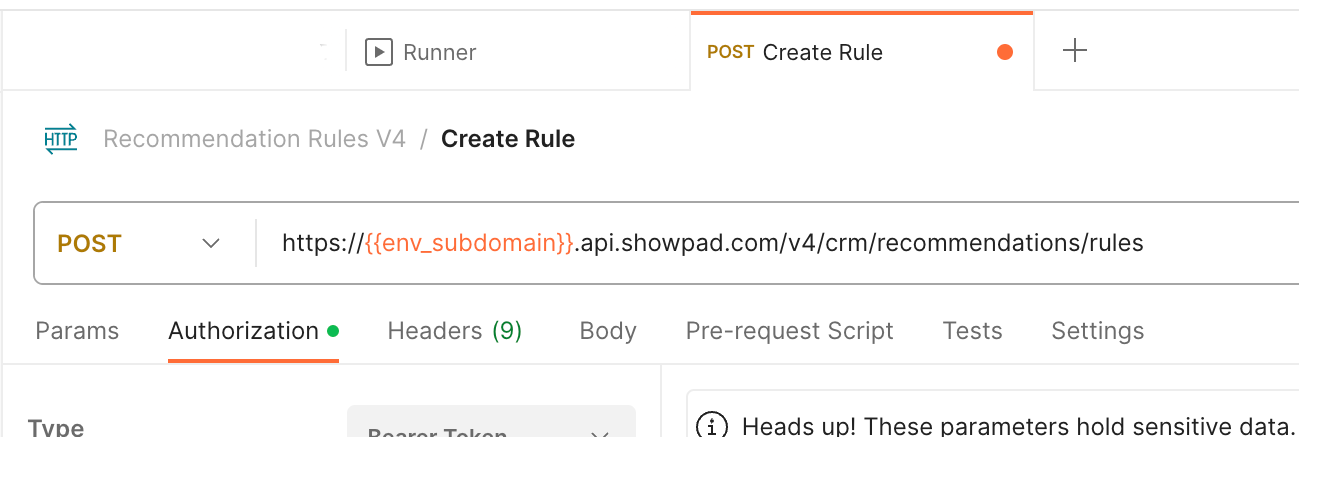
By using {{env_subdomain}} within your request, you can easily adapt your API calls to work in different environments
without needing to manually adjust the subdomain each time.
Click on Environments in the left sidebar and add the following variables in your environment:
-
env_subdomain: Set this to Showpad’s API base URL (e.g.,
https://{{subdomain}}.showpad.biz/api/v4). -
showpad_id: Enter the Showpad ID you got from Showpad.
-
client_secret: Enter the Client Secret you got from Showpad.
-
access_token: Leave this empty for now; you’ll set it up in a later step.
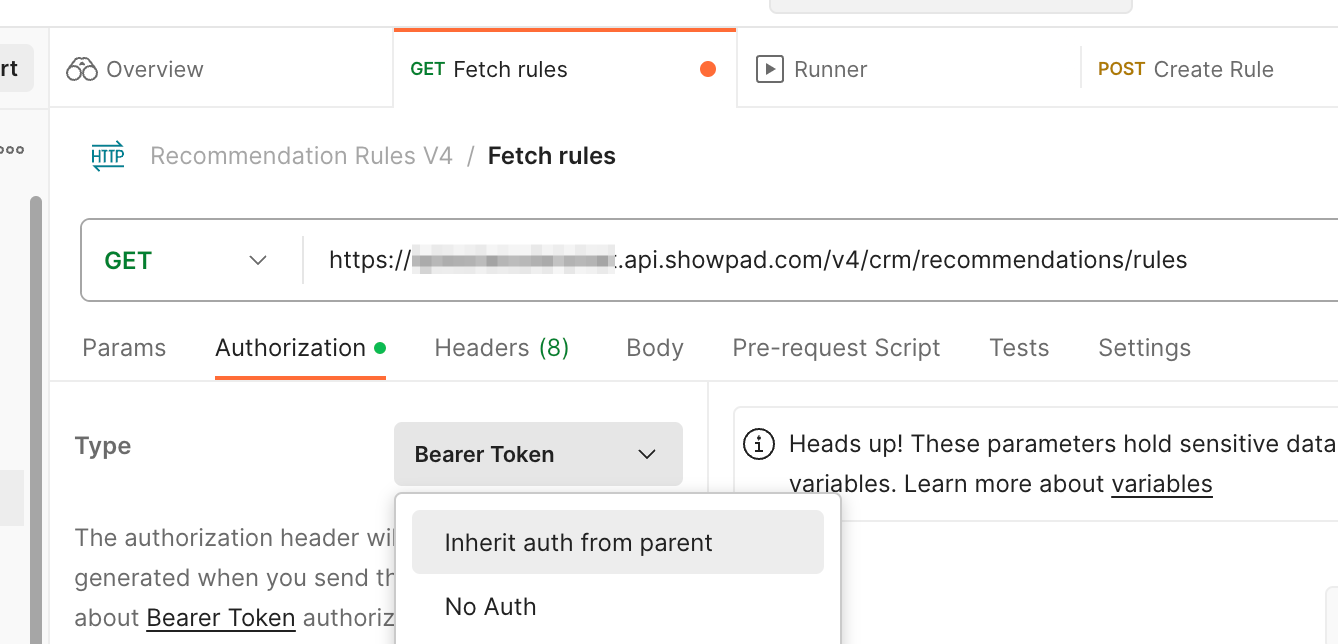
Authentication
On the Authorization tab, provide the following information:
- Type - Bearer Token
- Token - Enter your Showpad API token.
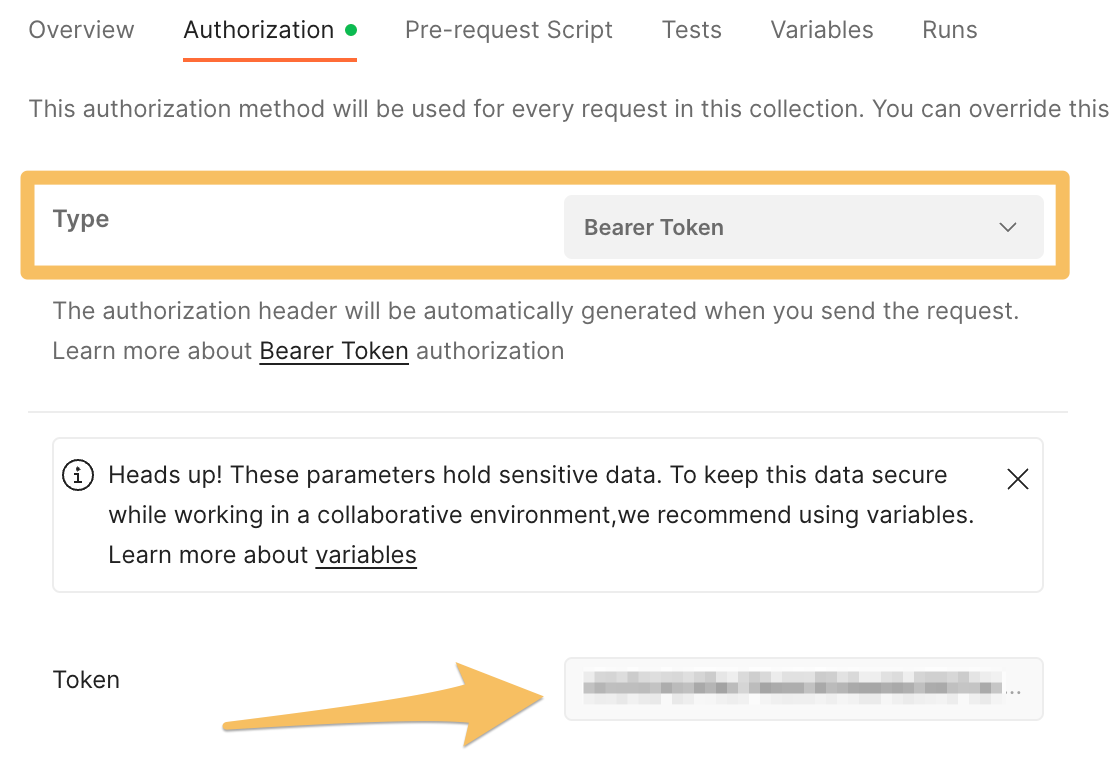
Do this in Postman on the collection level, not the individual request level, then all requests in the collection can use it.
On the collection you set it like this:
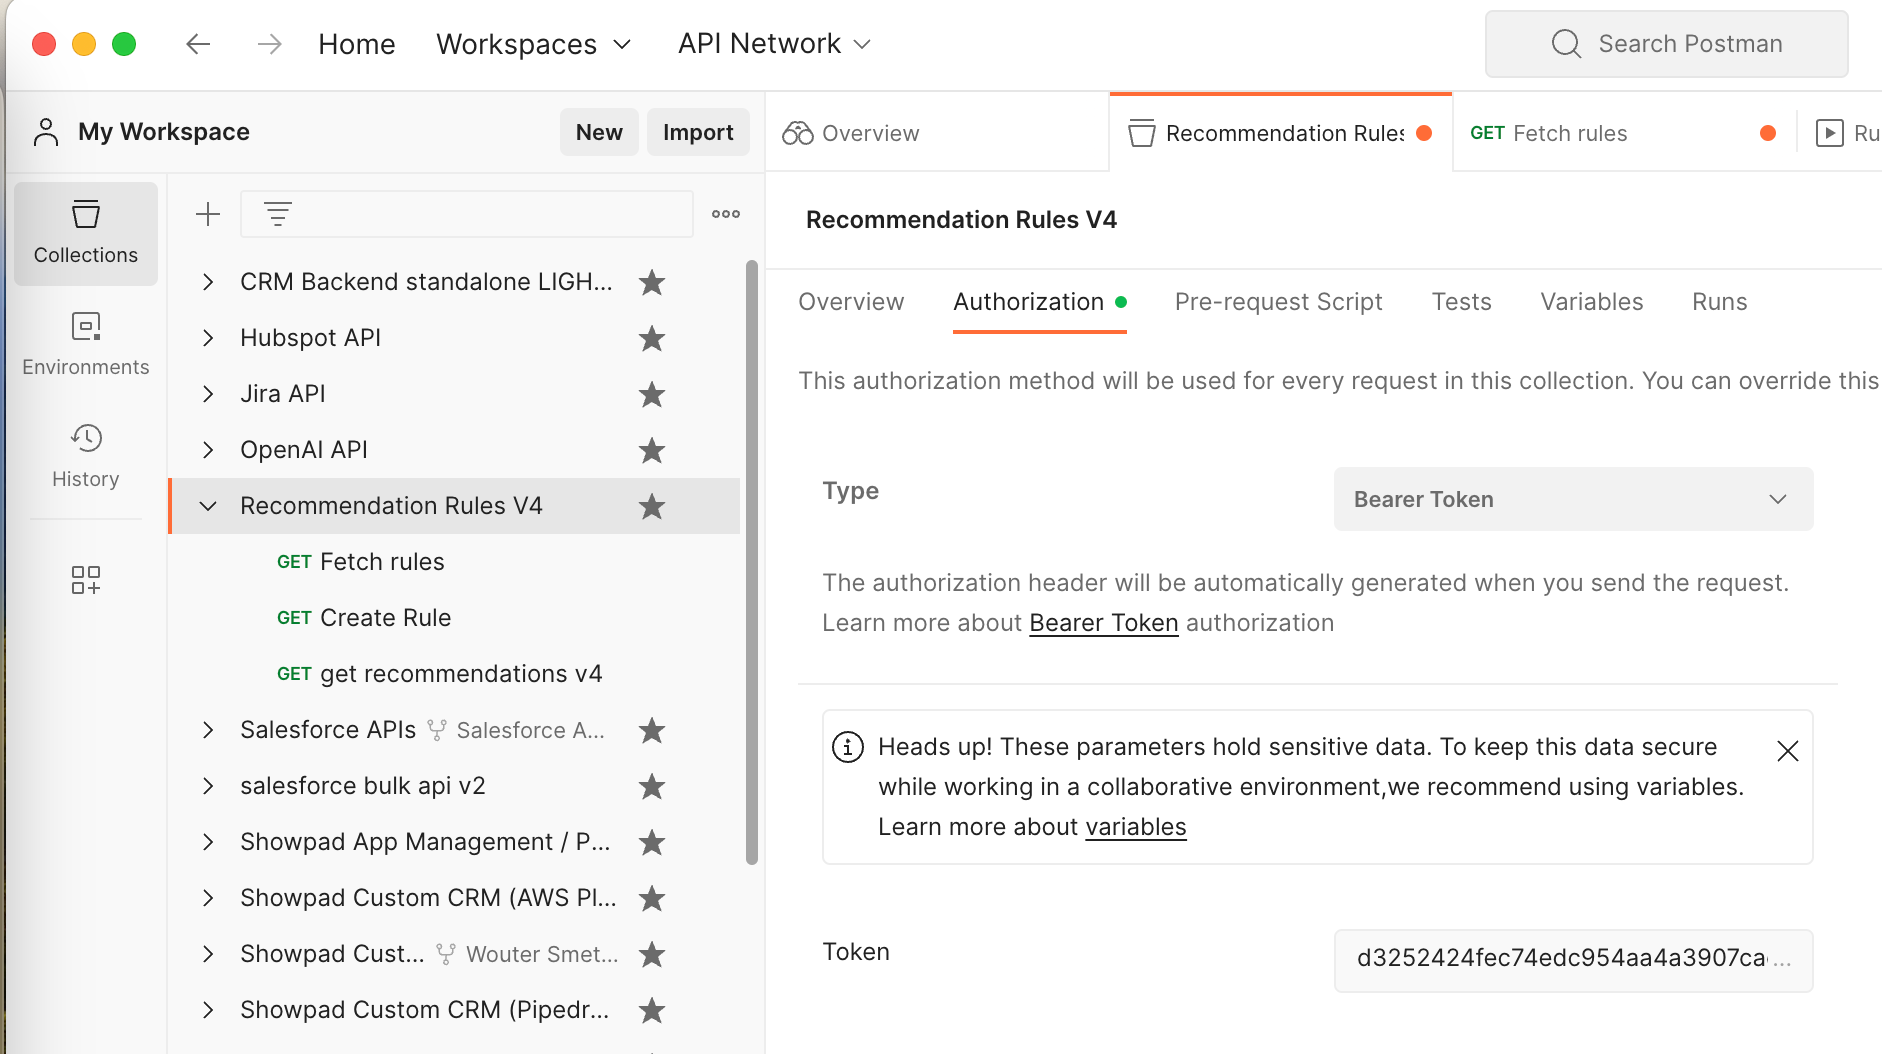
Then under each request, you'll specify Inherit auth from parent.
Requests
Working with APIs often involves more than just sending basic requests; to make the most of them, you need to understand how to manage dynamic data and customize requests for various scenarios.
There are two ways to execute requests in Postman:
- Individual request - Performed by pressing the Send button for a specific request. See the
Export Rules from Showpad section.

- Collection of requests - Performed using variables from a CSV file. See the Import Rules into Showpad section.
These capabilities make it a great tool to work with APIs without requiring extensive scripting or programming.
Export Rules from Showpad
You're now ready to send your first API request to retrieve your recommendation rules from Showpad:
GET https://{{env_subdomain}}.api.showpad.com/v4/crm/recommendations/rules
Save Results
After executing a succesful request, you can save the results to a file (typically in JSON format).
You may find that a .json file is hard to work with. In that case you may want to try using Visual Studio Code. It's a free text editor with many capabilities like editing multiple lines at the same time etc.
You'll find a handy VS Code plugin to convert JSON to CSV files here.
Import Rules into Showpad
In this example, we're using Postman to create a collection of requests that use variables from a CSV file. You can learn more about this process here.
To import multiple rules at once into Showpad from a CSV file, you'll need to:
-
Set up a Postman collection with individual
POSTrequests for each recommendation rule to import into Showpad. -
When your collection and requests are ready, click on the collection's three dot menu and select Run collection
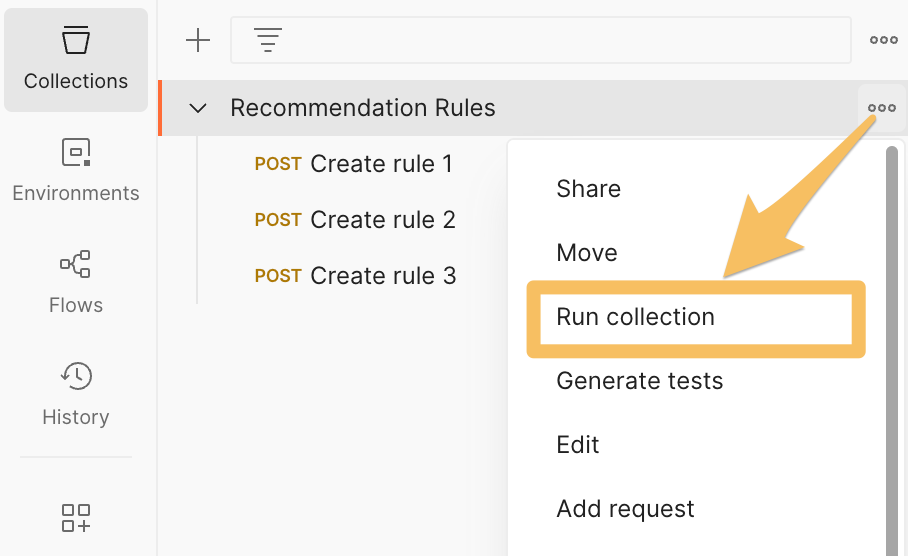
-
In the panel on the right, browse for your CSV by clicking the Select File button in the Data file section.
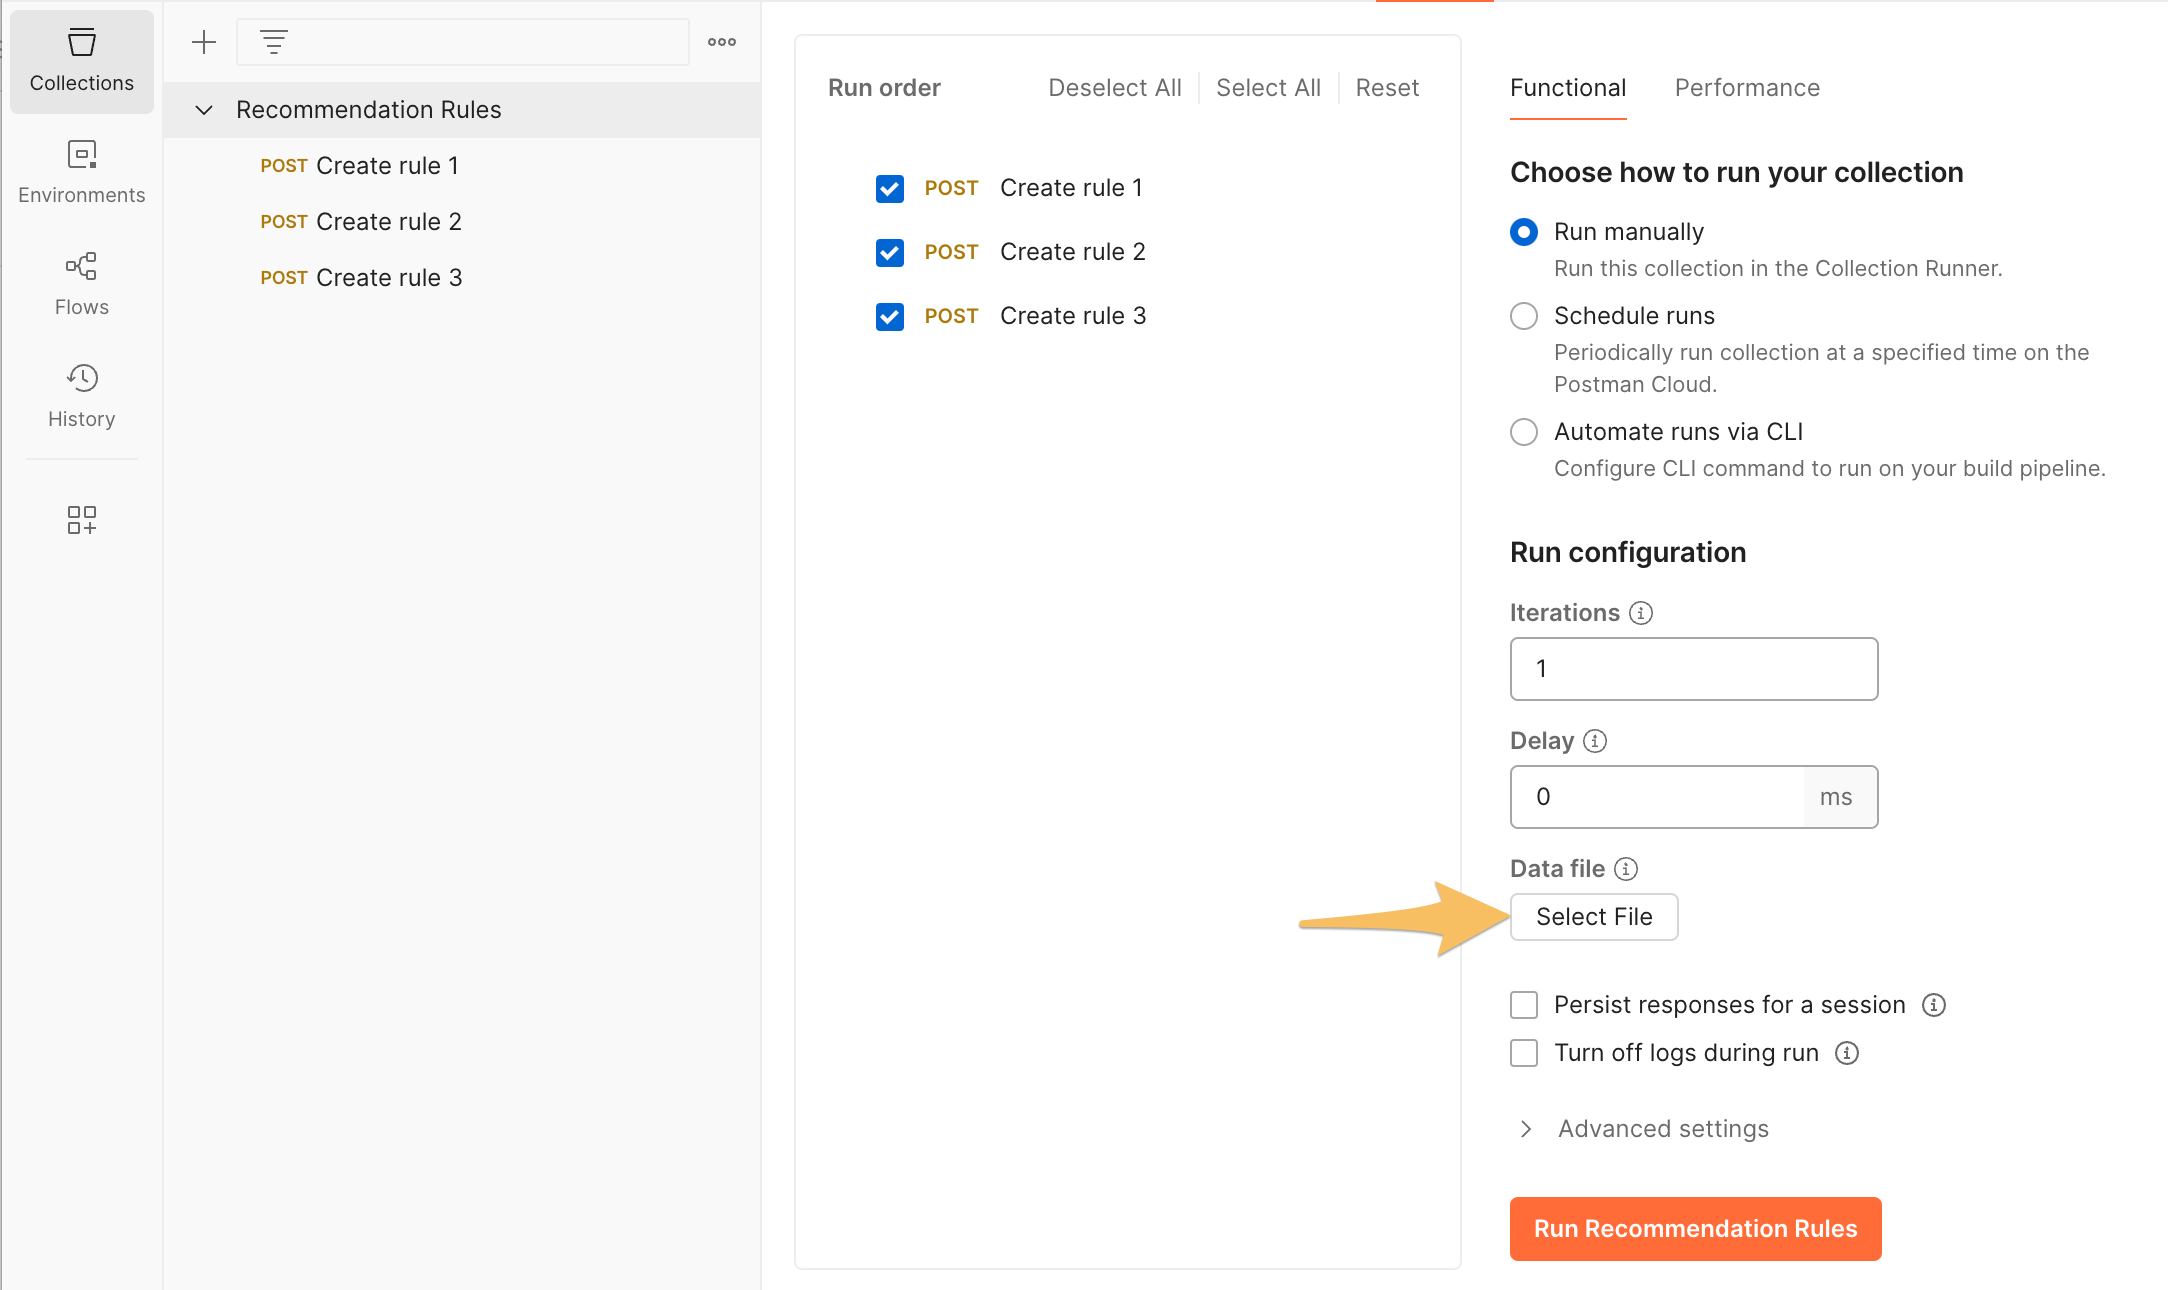
Note: The columns in your CSV must match your Postman variables.
-
Click the Run button.
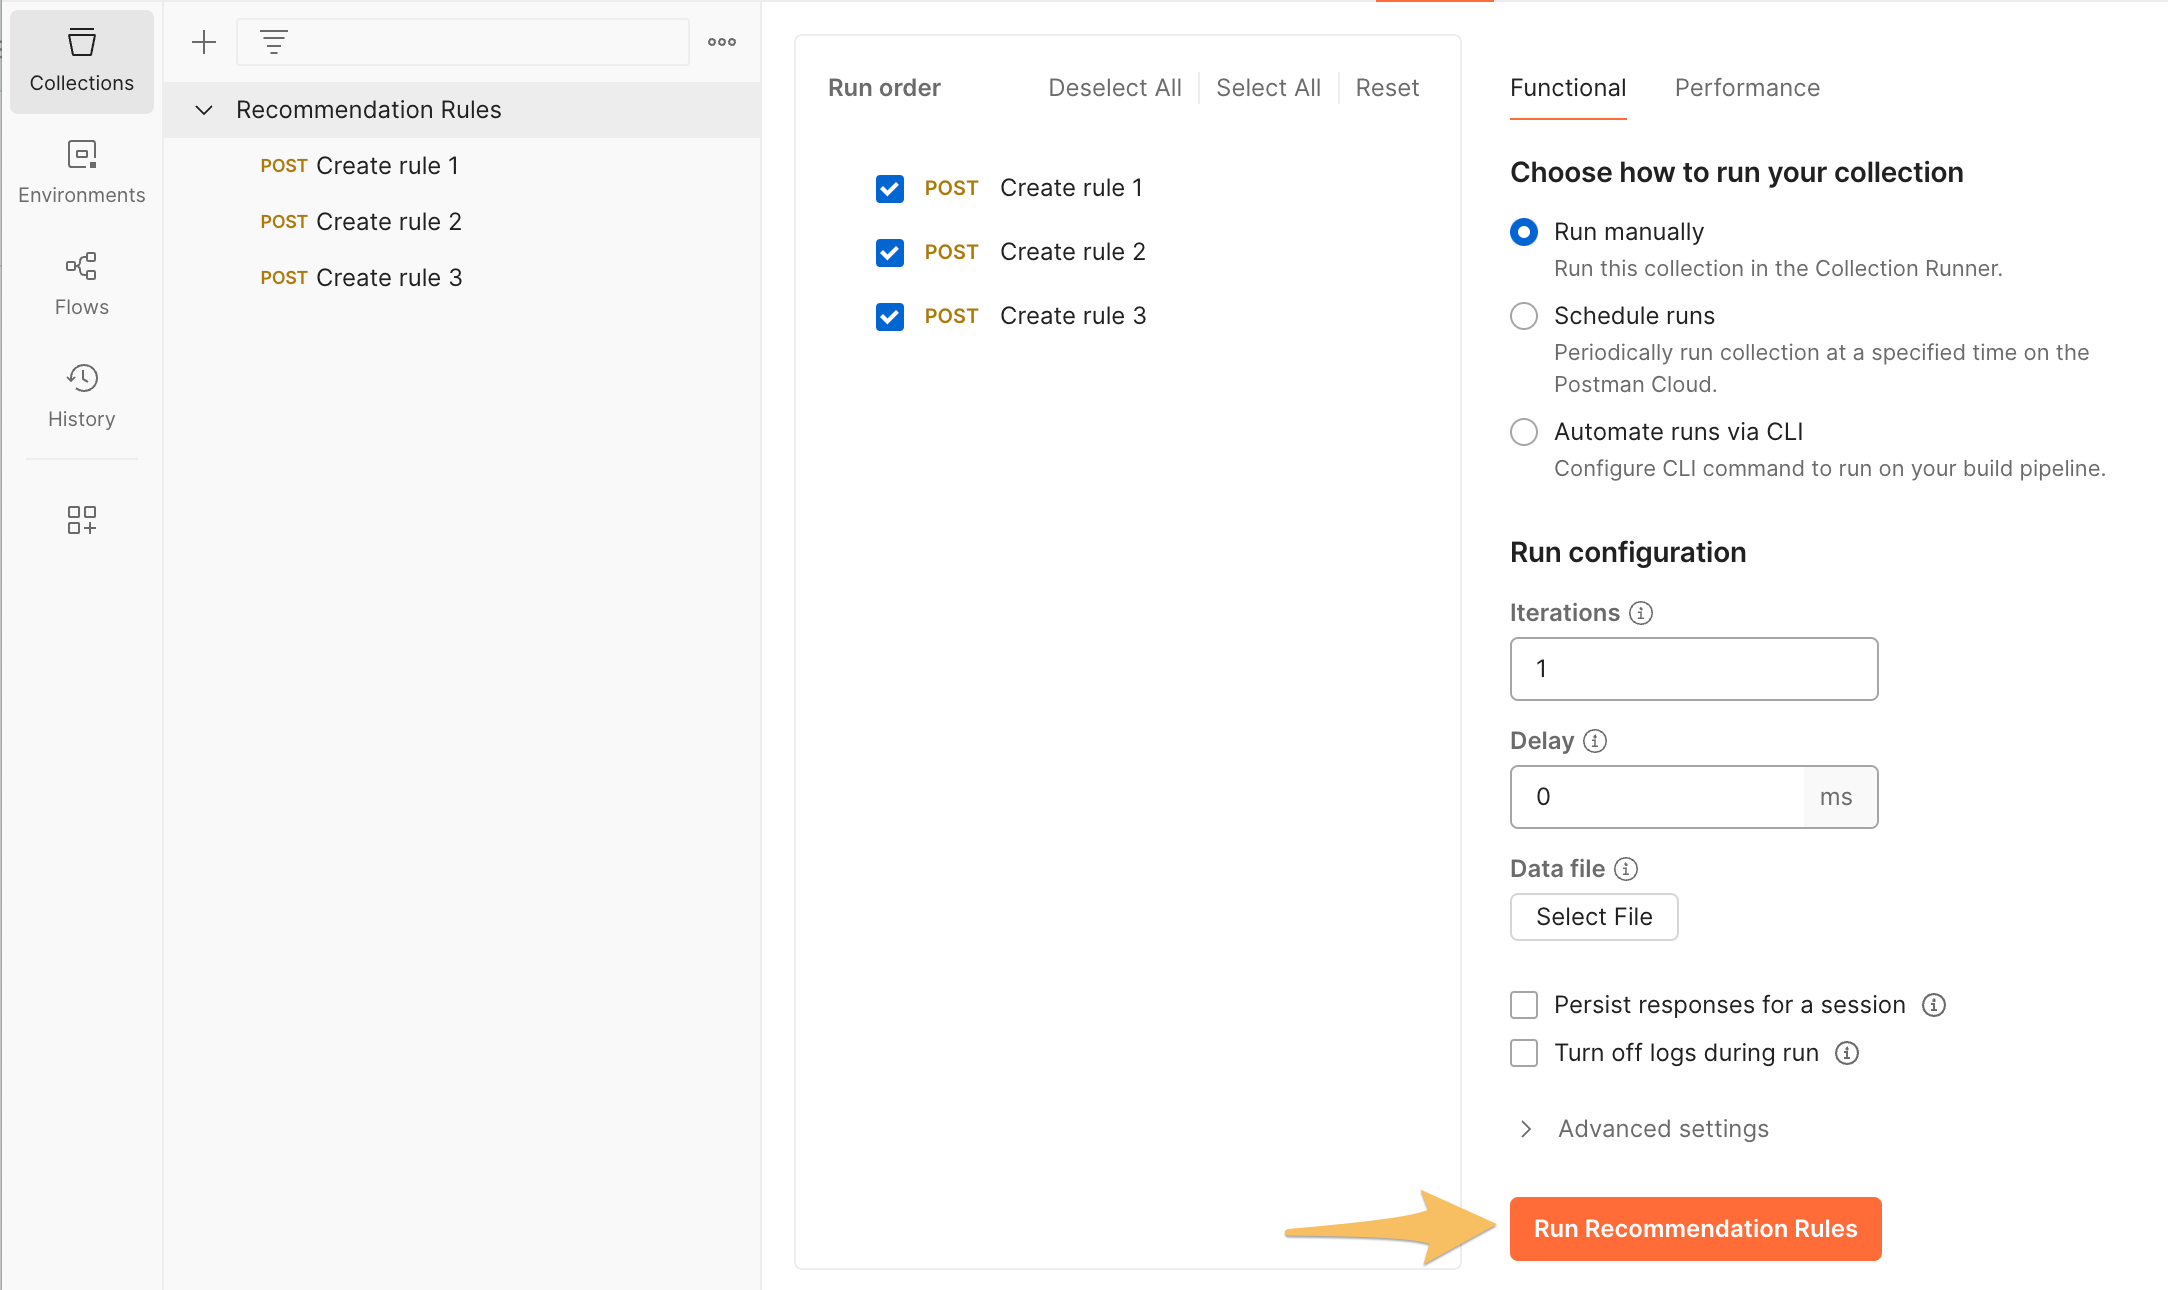
And that's it! Once you've got everything set up and running smoothly, you'll be able to import and export your recommendation rules with ease.
If you need assistance, please reach out to Showpad.