Upload to Showpad
The information here applies only for Showpad Apps v1 (deprecated). While your existing v1 Showpad Apps will continue to work, we strongly recommend:
- Creating new apps with Showpad Apps v2
- Migrating your v1 apps to v2
- Showpad Apps can not exceed 2GB
- If your Showpad App will be displayed in the Windows Desktop App, it must be able to run on (non-Chromium) Edge version 18 or above.
Via API
There following resources are available when uploading your app:
| Resource | Description |
|---|---|
| Upload | An upload resource is required to upload a .showpad package.When updating an existing app with a new version, the upload resource should be linked to the existing app. Once Showpad has completed processing the .showpad package, the upload resource will be linked to both the Showpad App and its versions. |
| App | A Showpad App is globally unique in Showpad, based on the identifier found in your manifest.json file.A Showpad App can have multiple versions linked to it. |
| Version | A single immutable version of an app, linked to a single version of an uploaded .showpad package. |
| Assignment | Enables a Showpad App to be accessed by customers (organizations). In order to access to your app, an assignment must be created. An assignment is linked to a specific version and an organization. You can assign different versions to different customers. Once assigned, the latest assigned version can be installed by the organization. |
You can find all the details about these resources in the App Portal API specification.
Upload New App
-
Create the upload resource:
POST /app-portal/v1/uploads
Content-Type: application/json

{} // empty json object as body for the POST
Response Example
{
  "id": "01ARZ3NDEKTSV4RRFFQ69G5FAV",
  "contentType": "application/vnd.showpad.app+zip",
  "uploadUrl": "https://my-upload-url",
  "status": "WAITING_FOR_UPLOAD",
  "createdBy": "xxxxx",
  "createdAt": "2023-04-18T07:10:33.461Z",
  "updatedAt": "2023-04-18T07:10:33.461Z"
} -
Next, it's time to add your package to the resource you just created using the
uploadUrlandcontentTypefrom the response you received:PUT {{uploadUrl}}
Content-Type: {{contentType}}
// {your .showpad package} as bodyIf your upload is successful, you’ll receive an empty response and a
200 Okstatus code.cautionAfter a successful upload, the package still needs to be processed. We highly recommend that you monitor the upload until the status is "ACTIVE".
Congratulations, you’ve uploaded & created a Showpad App!
Monitor Uploads
You can monitor the upload process and its status with the following code, using
the id you received when creating the upload resource as the uploadId:
GET /app-portal/v1/uploads/{{uploadId}}
Response Example
{
  "id": "01ARZ3NDEKTSV4RRFFQ69G5FAV",
  "contentType": "application/vnd.showpad.app+zip",
  "status": "ACTIVE",
  "createdBy": "xxx",
  "createdAt": "2023-04-18T07:10:33.461Z",
  "updatedAt": "2023-04-18T07:10:33.461Z",
  "app": {
    "id": "01ARZ3NDEKTSV4RRFFQ69G5FAV",
    "appKey": "com.showpad.example.app",
    ...
  },
  "version": {
    "id": "01ARZ3NDEKTSV4RRFFQ69G5FAV",
    "appId": "01ARZ3NDEKTSV4RRFFQ69G5FAV",
    ...
  }
}
During processing, the status will be WAITING_FOR_UPLOAD. If the status is:
ACTIVE- Your package has processed correctly. Theappandversionproperties are provided. This is where you can retrieve theappIdandversionIdof your Showpad App.FAILED- Your package has not processed correctly. The error property will contain more details.
The following endpoints can provide more details about your:
- Showpad App
- All apps -
/app-portal/v1/apps - A single app -
/app-portal/v1/apps/{{appId}}
- All apps -
- Showpad App versions
- All versions -
/app-portal/v1/apps/{{appId}}/versions - A single version -
/app-portal/v1/versions/{{versionId}}
- All versions -
Update App Version
-
Create a new package with the same identifier in the
manifest.json, but with an increased version (semantic versioning format). -
Fetch the
appIdfrom the app you want to upload. You can use the/app-portal/v1/appsendpoint for this. Follow the same steps as Upload New App, but use the following body:POST /app-portal/v1/uploads
Content-Type: application/json
{
"appId": "{{appId}}"
}This will link the created upload to your specific app. The processing of the upload will fail if the identifier in the manifest does not match the identifier of the provided
appId. You can very the update via the Monitor Uploads process.
Via CLI
Upload App
The apps upload
command enables you to publish your newly created app or its new version to
Showpad. This command:
- Validates the
manifest.jsonfile. - Retrieves the
identifier(used as theapp key) andversionfrom the manifest. - Checks if an app with the given app key has already been uploaded:
- If not, the command uploads the app as a new app.
- If an app with the app key already exists, the command uploads as a new version of the app.
To upload your app with this command, run the following:
- npm
- yarn
npx experience-app-cli apps upload {{path/to/file}}
yarn experience-app-cli apps upload {{path/to/file}}
Possible Outcomes
- Success - A message is displayed indicating that the app is now active. The
message includes
AppIdandversionof uploaded app - Failure - The command provides details about the reason for the failure and notifies that the app couldn't be uploaded.
Upload Status
In some cases, an upload may take longer than usual. The command attempts to
check the upload status 10 times. If the upload hasn't completed during this
time, the uploadId is displayed, as well as the command to track the upload
status.
[experience-app-cli] The App has not become active after 10 attempts.
To continue tracking the status of the app upload,
please execute the following command:

 experience-app-cli apps status --upload-id 01H1VPZ2ABKDH00NEAWBMCN6HF
Legacy Options
The following options are deprecated. They will continue to work but will be sunsetted in the future. We highly recommend using the methods described above.
Via Admin App
The first step to deploy your Showpad App is to upload it to Showpad.
-
Log into your Showpad Admin App as an administrator.
-
Select the Library tab. If relevant, select a division.
-
Click the Open Experience Builder button.
-
Select Create a New Experience.
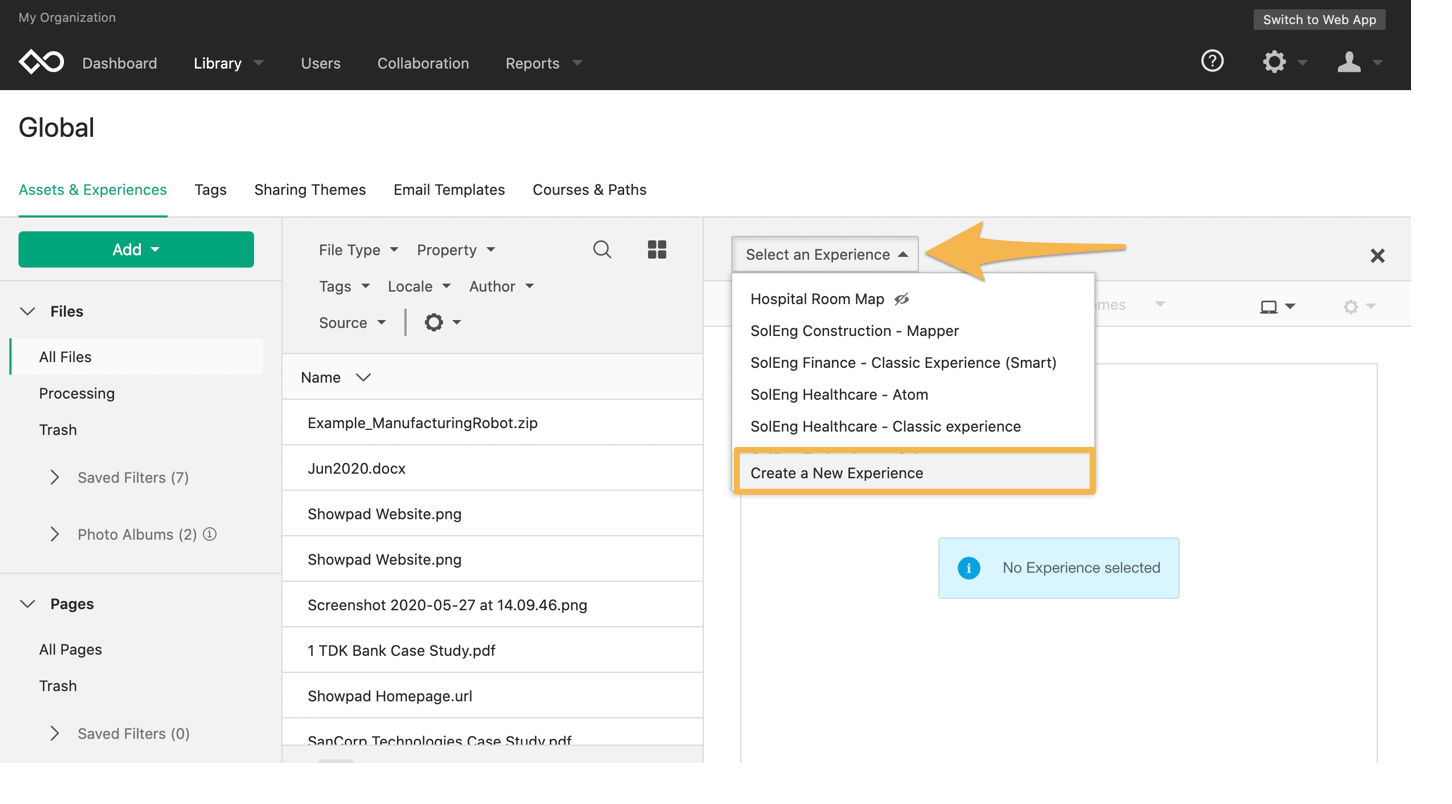
-
Select Your Experience App.
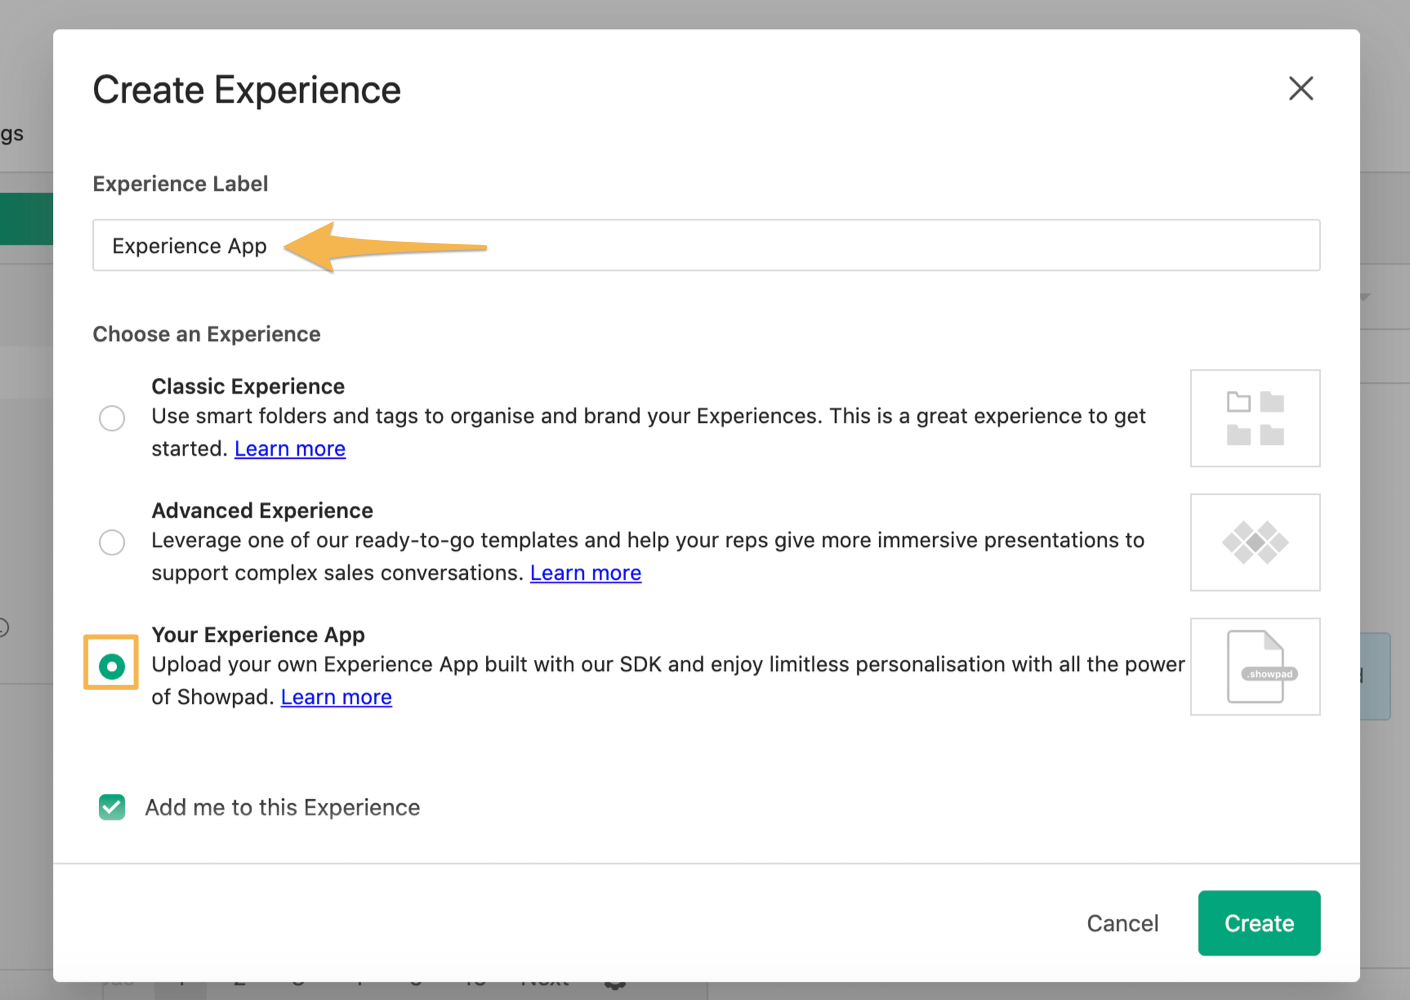
Enter the following information:
-
Experience Label: provide a name for your app
-
Choose an Experience: Your Experience App
-
Select the Add me to this Experience checkbox
-
Click the Create button.
-
-
Click the Upload Experience App button in the Experience Apps Builder.

-
Click the Select content button and select your
.showpadpackage.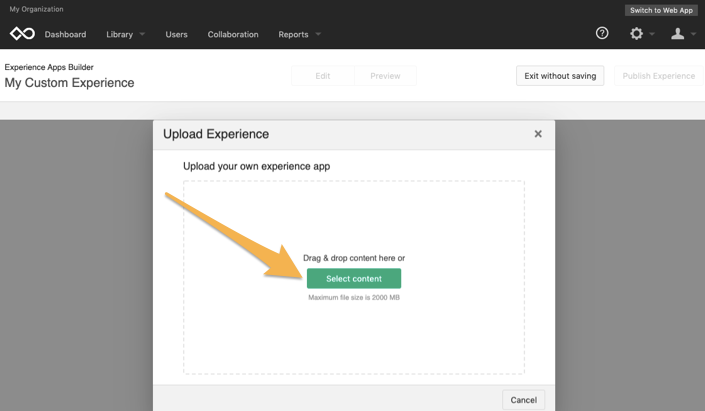
Showpad will validate your package.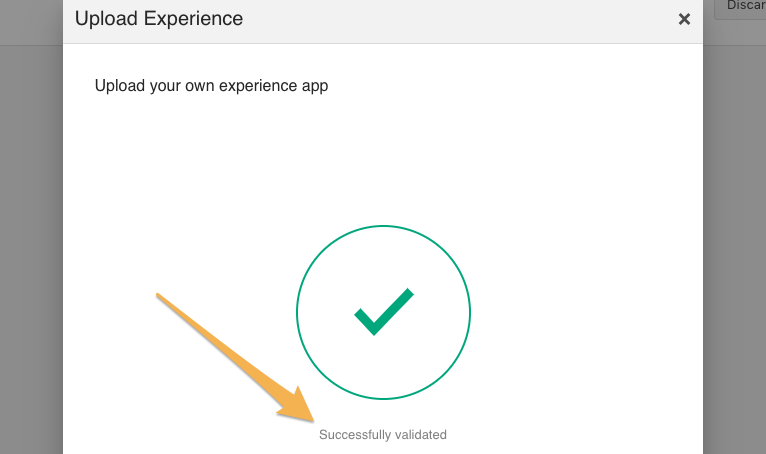
If you need to troubleshoot an error, check out the Error Reference. -
Click the Publish Experience button.
Congratulations! You've just uploaded and published your custom Experience App!
When uploading a new version of an Experience App, previously set values with the same key are not overwritten. This is to prevent changes made by an administrator from being overwritten. You can force an override by selecting the checkbox option when uploading.
Via Experience App CLI
Version 2.x and Version 3.0.1
Use the
Experience App CLI to
create the channel (experience) in Showpad from your .showpad bundle.
- npm
- yarn
npx experience-app-cli create
yarn experience-app-cli create
If you didn't pass the --channel_name option, the Experience App CLI will
suggest defaults from the manifest.json file for the channel name.
[experience-app-cli] AxiosError Request failed with status code 409 means a
channel with the given name already exists.
The experience-app-cli create command is deprecated starting from version
3.1.0. It is recommended to use the apps upload command instead. Please refer
to the updated documentation for the latest command usage and examples. :::